
Optimal Design for Zoom Room Deployment
We work with many customers who are building new or retrofitting old spaces for building Zoom Rooms. We’ve found that there are substantial challenges that our customers face when designing these spaces for optimal Zoom Room deployments. Our team has been able to help build thousands of these spaces for all different organizations. This article is to help workplace, facilities, operations and IT Teams start off on the right foot when looking at the optimal way to design a Zoom Room. This would apply for just about any other type of video conference system whether its MS Teams or WebEx. Below you’ll see our 5 recommendations and a room layout plan.
- Furniture layout
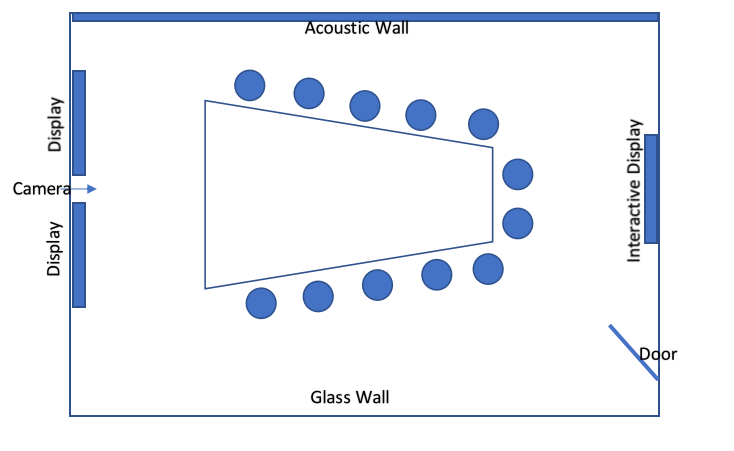
Video conference rooms need to be oriented so that everyone within the room can easily see each other and people on the far end of the call can see those sitting in the room. We’ve found that many organizations have long rectangular tables and when everyone is seated at a meeting, faces of one are blocking faces of others. To prevent this from happening we’ve found that the most important thing to do is have some shape to the table where every seat in the room is naturally oriented at the display/camera location. Trapezoid and half-moon tables allow each seat to be seen on the camera without having to slide your chair in/out during the meeting. Other ways to get around this is to have two cameras on each side of the display oriented where the line of sight focuses at one sides of the table at a time.
- Display location
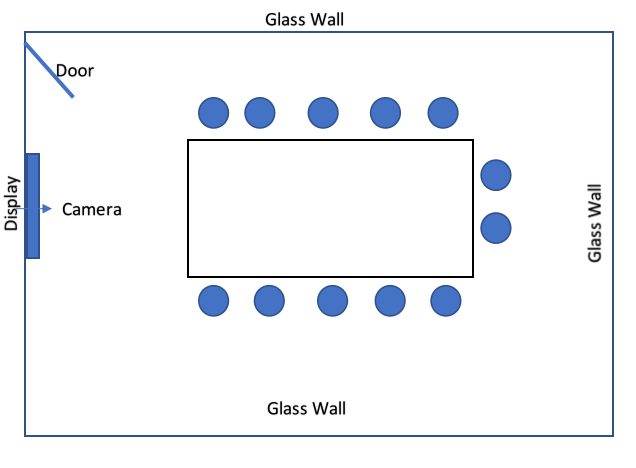
The location of the display in a conference room should be on the opposite wall of the door and facing adjacent to any outdoor lighting so that the outdoor lighting isn’t shining directly into the camera or display. When the room has (3) glass walls, there isn’t much you can do other than mount the display on a cart at one of the glass walls opposite the door. The locations of the interactive display is really a preference of the team who is using the interactive display as the adjacent or opposite wall both work.
- Room orientation
The room orientation should consider the flow of traffic in/out of the conference room when a meeting is in progress. If the main display is on the wall next to the door, then people entering the room will likely have to pass in front of the camera to be able to access a seat at the table. There are many modernizations happening to the workplace with more companies adding in couches and high top tables to conference rooms for more informal quick meetups.
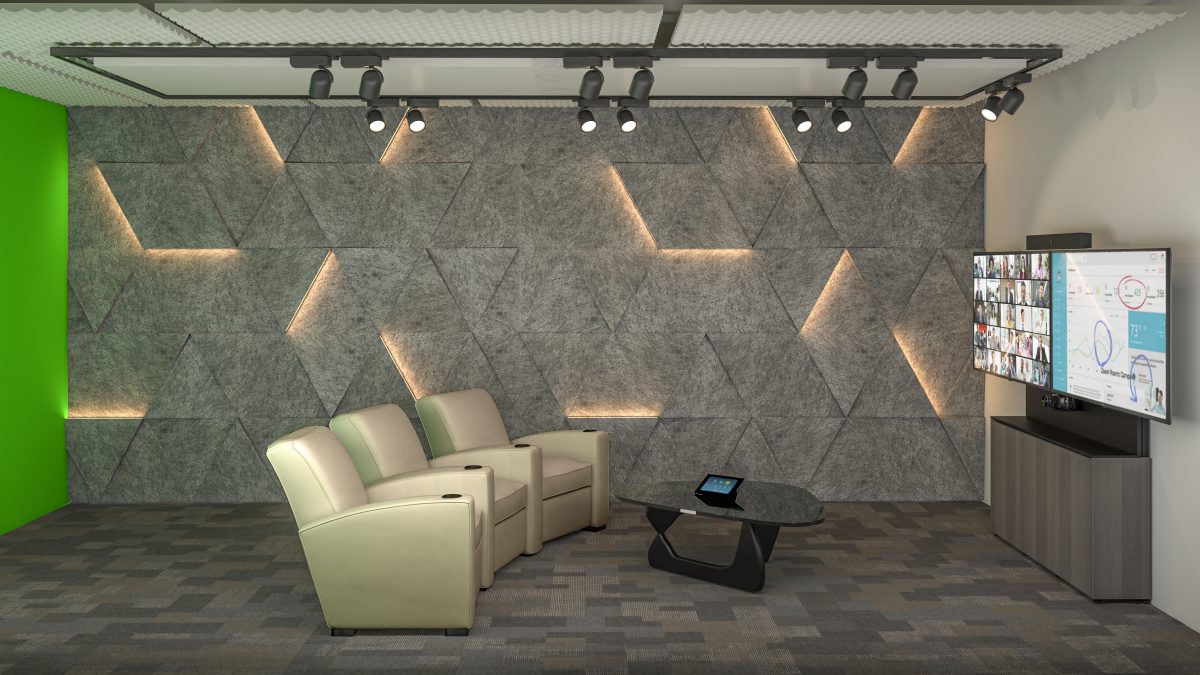
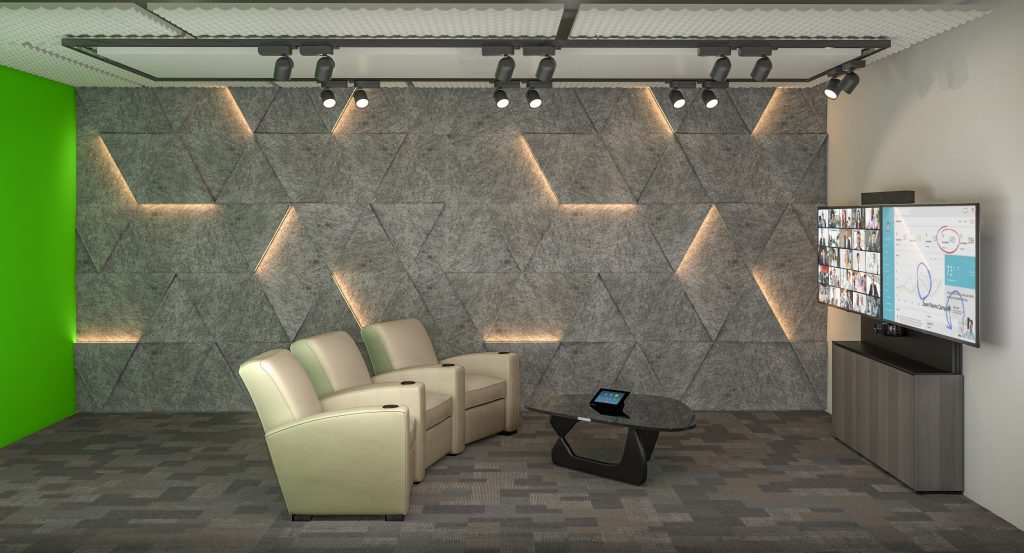
- Room Acoustics
Room acoustics are extremely important to a having a good in-room meeting experience with or without a Zoom meeting happening. Rooms with 2-3 glass walls and concrete/hardwood floors should always focus on adding in some type of acoustic paneling wherever possible. Acoustic panels absorb sound within a room which helps to reduce the reverberation and echo in a space. Microphones and speakers are sensitive to sound reverberation within a room which will make in-room acoustics suffer. We recommend adding some type of acoustic paneling to almost any space where there aren’t any carpets or sound absorptive surfaces.
- Data and Power
All Zoom Room deployments call for network and power to be located at particular areas within a room. If there is existing locations where data/power is located, but they aren’t the exact locations, please consult with your AV/IT Team to see if they will be seen when new displays/cameras are mounted. If there aren’t any existing locations, new data/power drops will need to be placed within the room. We recommend that the network and IT Team double check that these ports are live and ready for implementation prior to installing AV hardware to help prevent doubling the labor when completing an AV install. Less than 50% of customers will have network/power 100% correct prior to installing AV which will cause a disruption in the Zoom Room go-live.
Check our Optimal and Suboptimal Zoom Room layouts/orientations below.
Optimal Zoom Room Layout
Sub-Optimal Zoom Room Layout
